Creating API tokens
Getting Started
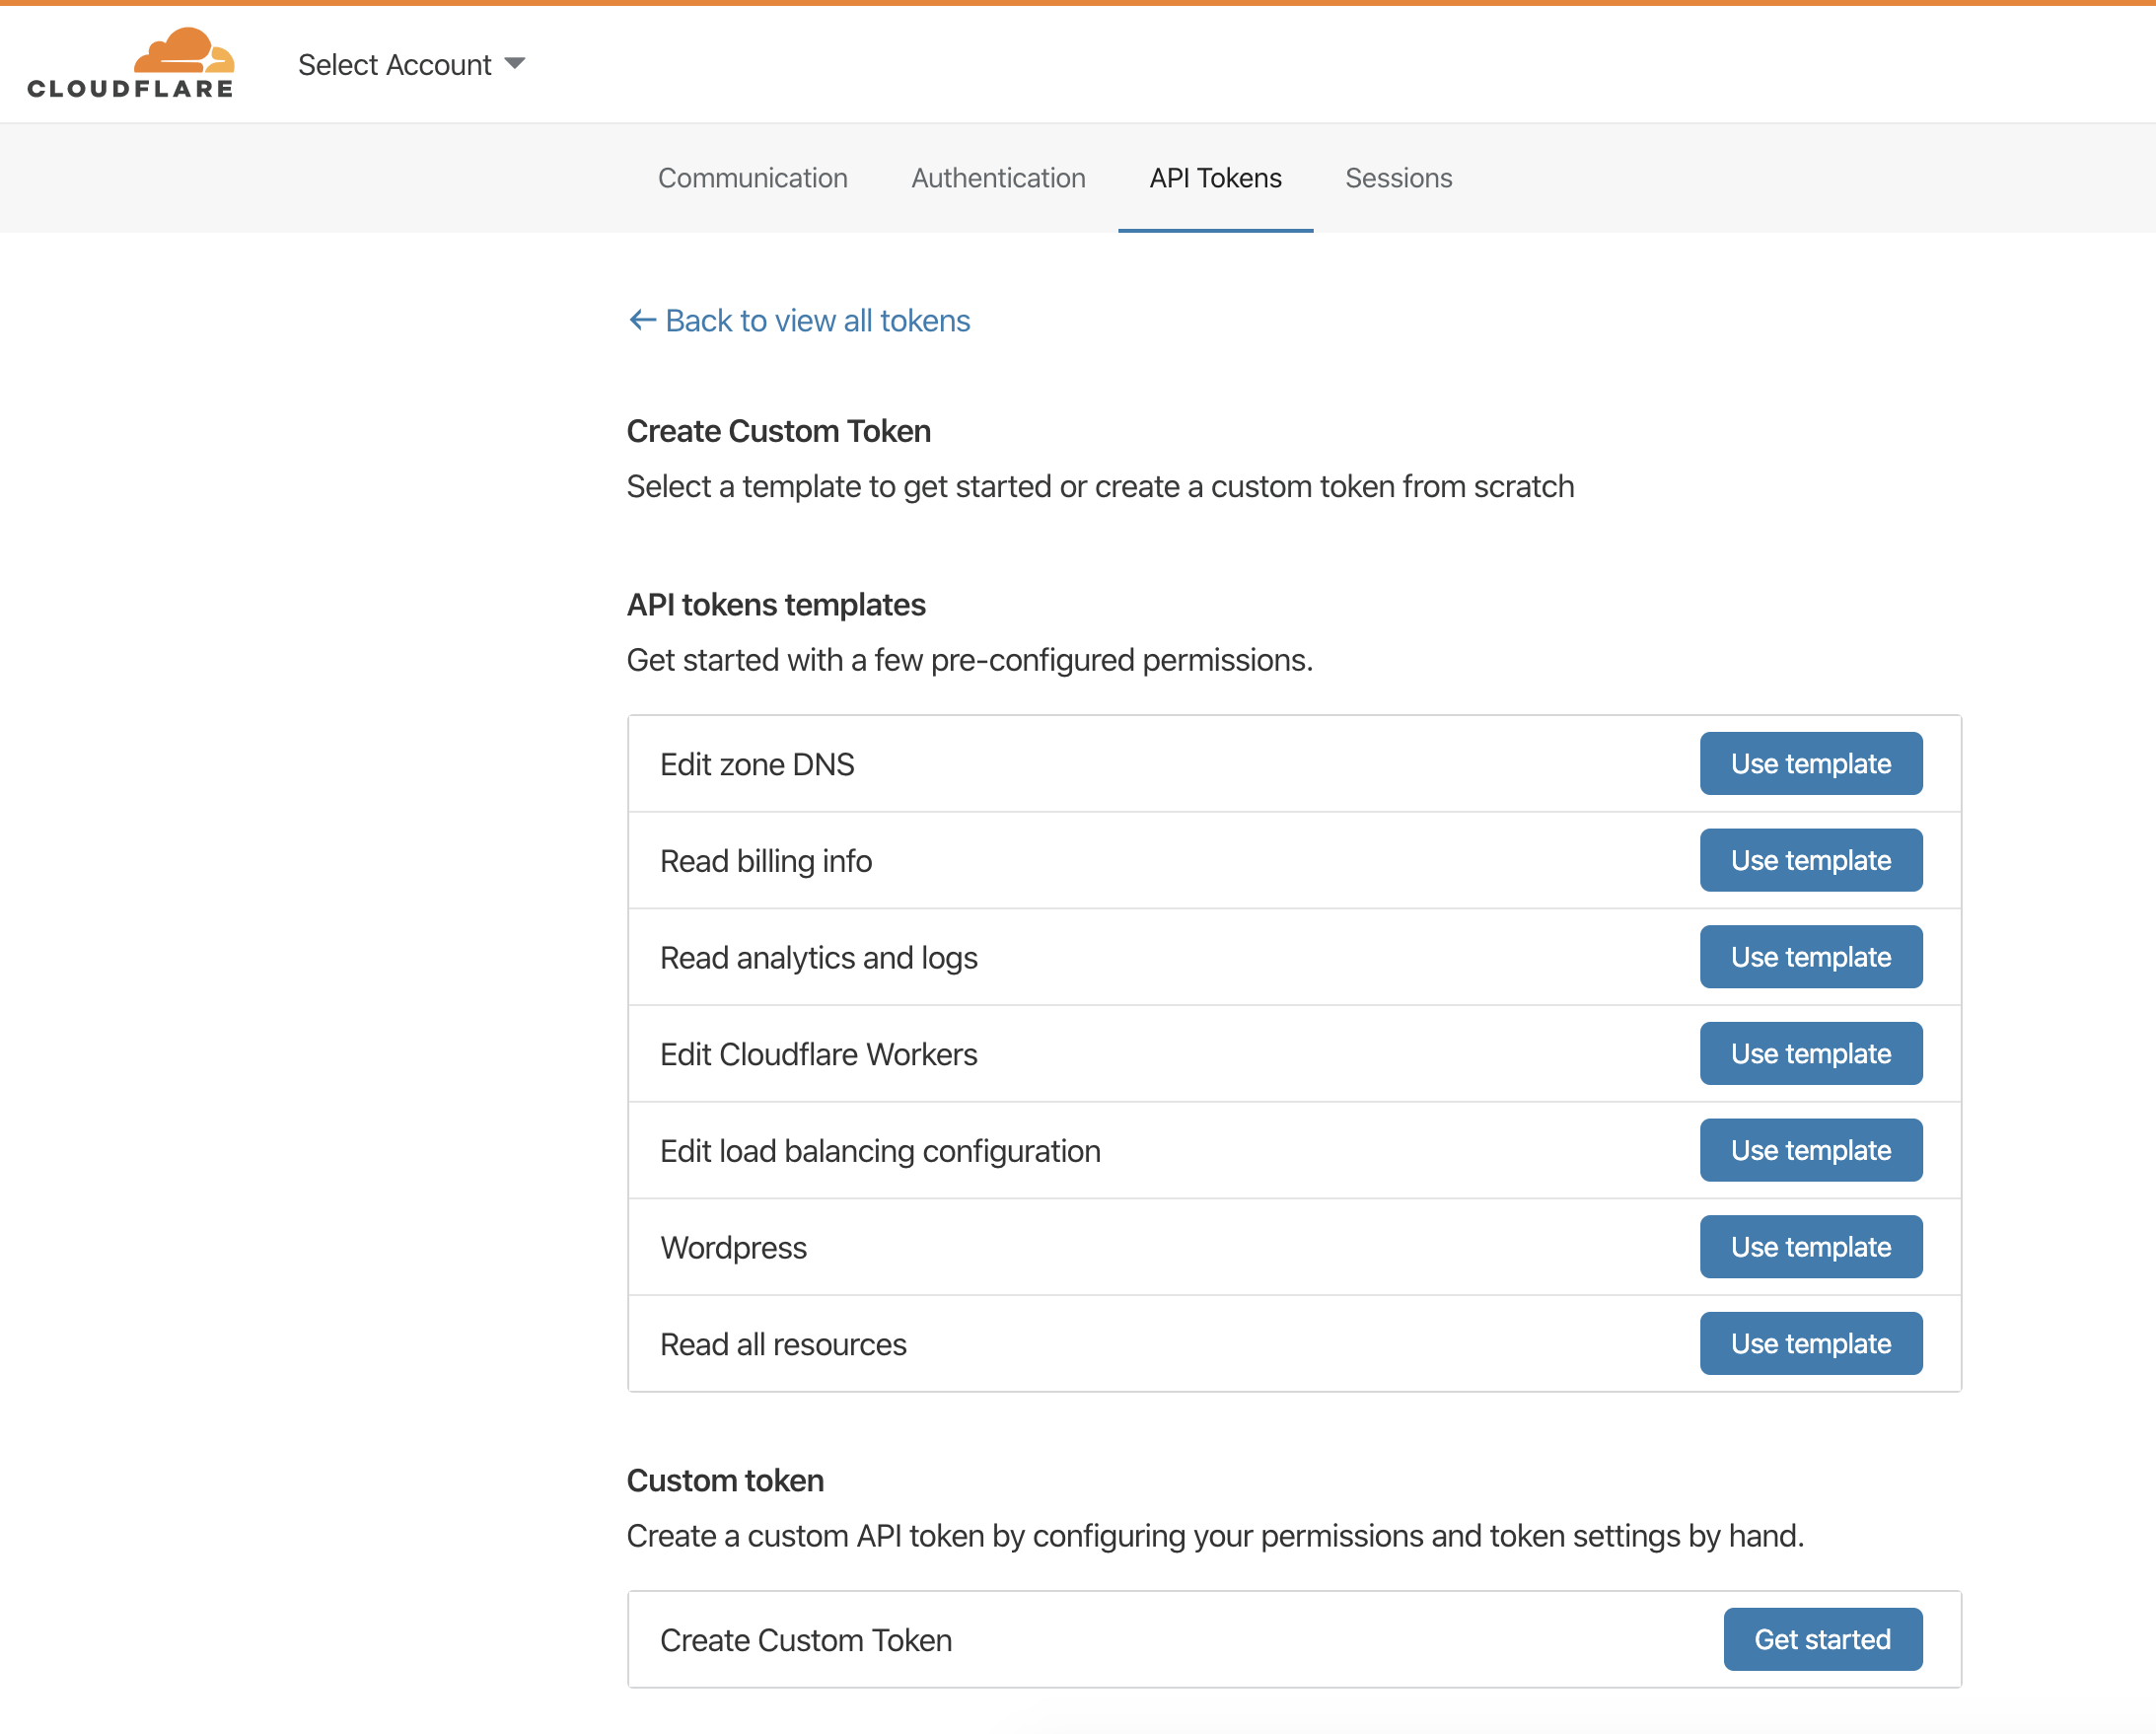
To get started creating an API Token, log in to the Cloudflare dashboard and go to User Profile -> API Tokens or click here. From the API Token home screen select Create Token.
If you are new to API Tokens or the Cloudflare API, Templates are the quickest way to get started. If you think a specific template matches your needs, go ahead and select it. You will be able to further customize the template after selecting it. If no template matches your use case or you want to build the token from scratch, select Create Custom Token
Customizing the Token
For this example, the Edit Zone DNS template has been selected. After selecting, you are presented with a view of the currently selected permissions. There are 3 required inputs to creating a Token:
- The token name
- The permissions granted to the token
- The resources the token can affect
There are two additional inputs that can be used to restrict how a token is used. These are IP restrictions and Time to Live (TTL) restrictions. Both of these are covered in Advance Usage under Restricting Token Use
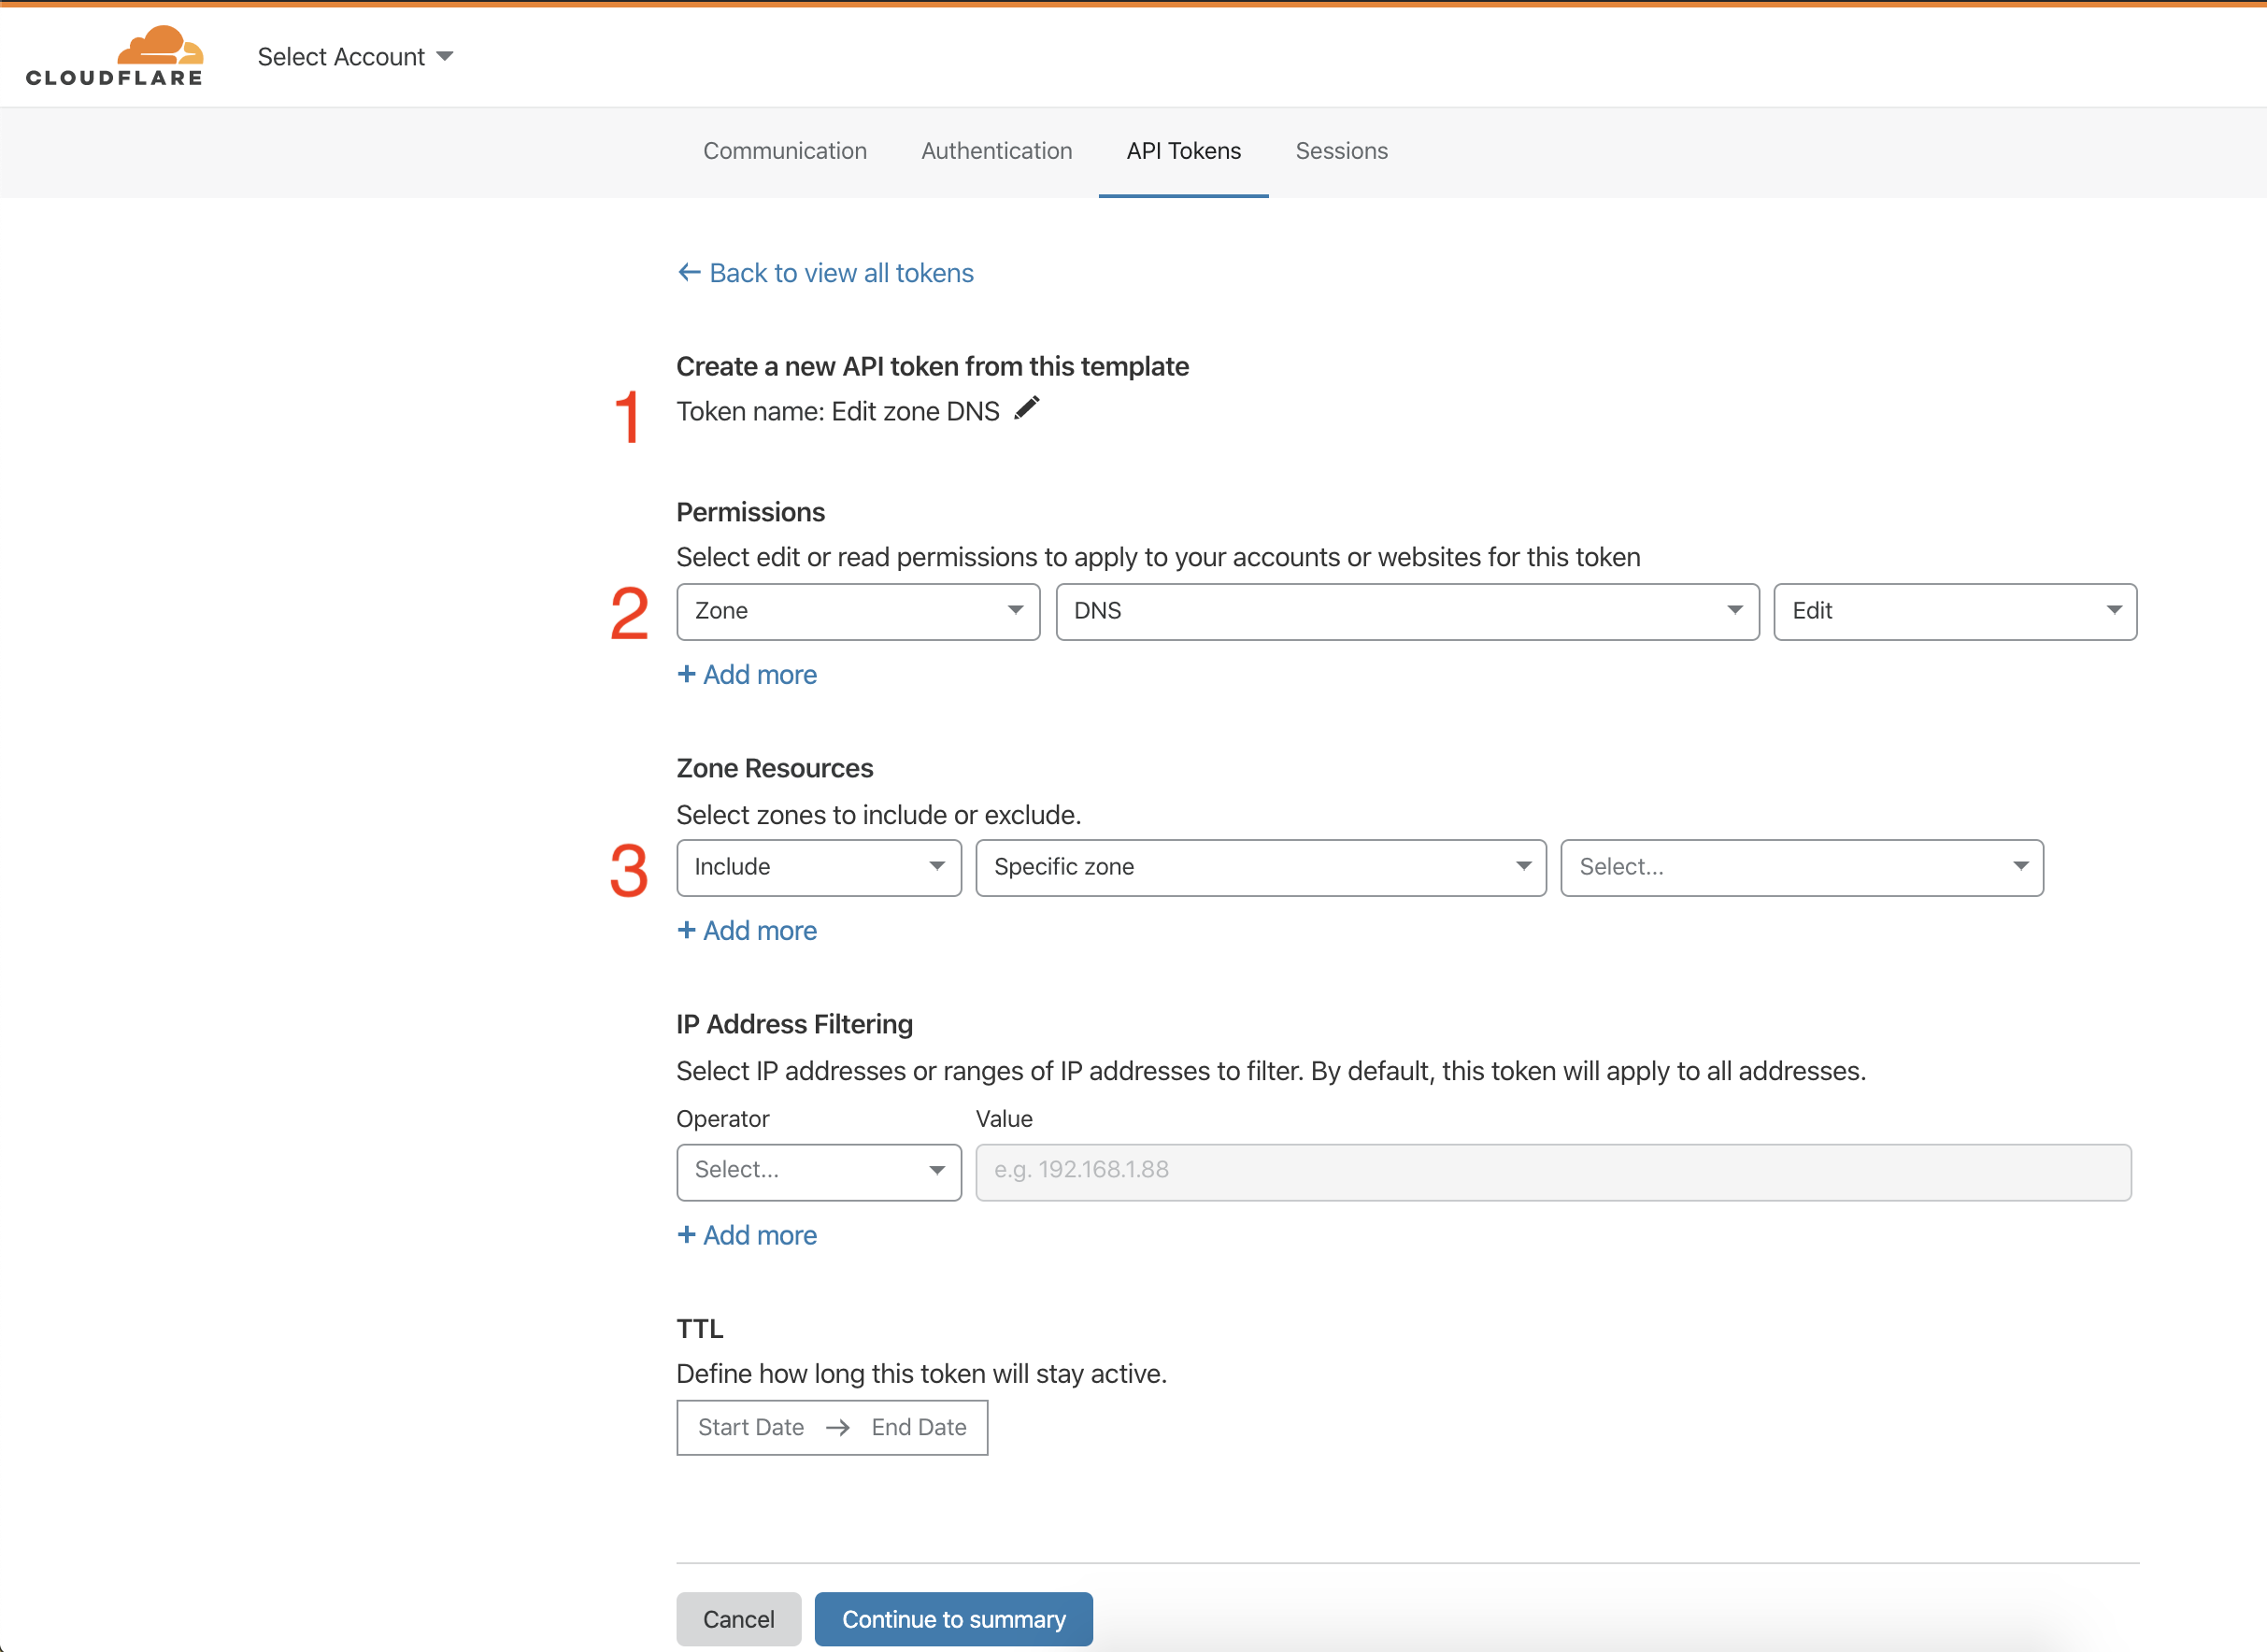
Because a template was selected, both the name and the permissions have been pre-selected. In the case of a custom token, both of inputs one and two would need to be filled in. the only required selection is which zones the token should belong to. Let’s cover each of these sections.
Token Name
This can be anything text and should be informative of why or how the token is being used as a reference.
Token Permissions
Permissions are segmented into three categories based on resource:
- Zone Permissions
- Account Permissions
- User Permissions
Each category contains Permission Groups related to those resources. DNS permissions belong to the Zone category, while Billing permissions belong to the Account category. A full list of the Permission Groups can be found here
After selecting a Permission Group, you can choose what level of access to grant the token. Most groups offer Edit or Read options. Edit is full CRUDL (create, read, update, delete, list) access, while Read is just the read permission and list where appropriate.
Token Resources
The resources selected will be the only ones that the token will be able to perform the authorized actions against. For example granting Zone DNS Read access to a zone example.com will allow the token to read DNS records for only that specific zone. Any other zone will return an error for DNS record reads operations. Any other operation on that zone will also return an error.
As permissions are selected in resource categories, options for selecting the appropriate resources will appear. Note that for user permissions, there is no necessary selection as the token will operate on the user creating the token.
Zone Resources
When creating tokens with access to zone resources there are multiple ways to define the access. The options available are:
- A specific zone - ex: example.com.
- All zones from a specific account - ex: All zones belonging to the account named
example production. - All zones in all accounts. This grants access to every zone you have access to. Exercise caution when granting permissions this widely.
Note: When selections of option 2 or 3 are included, then excluding zones can be used to “allow all” zones as defined except specific zones.
For this example, we go with option 1 and select the zone theburritobot.com.

Account Resources
Account resources are similar to zone resources but with 1 less option:
- A specific account - ex: My Production Account.
- All accounts. This would be all the accounts the user has access to.
Once you have selected the appropriate permissions and resources, select Continue to Summary to review the token before creating.
Verifying Your Selection
The token summary screen allows you to see all the resources and permissions the token will have before creating the token and seeing the token’s secret.
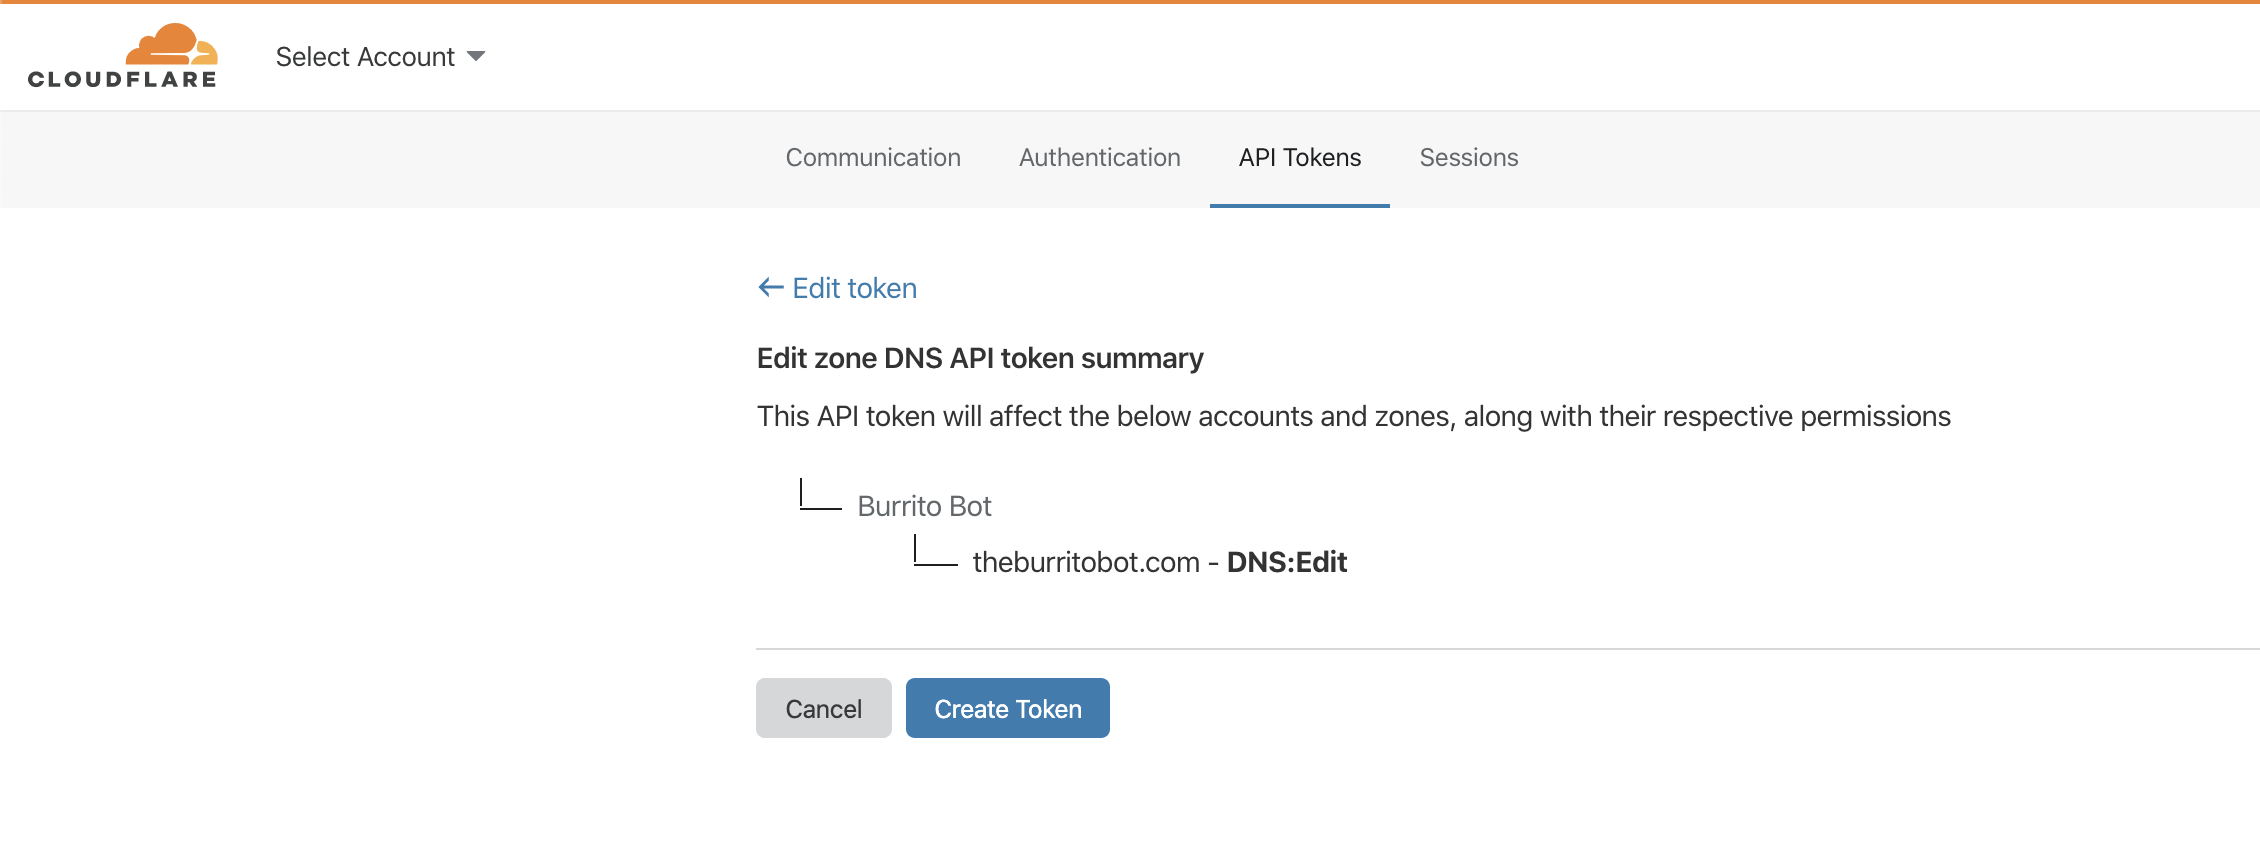
If there are any issues you can go back and make adjustments. Even if after creating and using the token modifications need to be made, a token can be edited after creation.
Once you have verified the token is as desired, select Create Token to proceed to generating the Token’s secret.
Generating the Token
Once successfully generated, the token secret is only shown once. Make sure to copy the secret to a secure place.
Warning: Do not store the secret in plaintext where others may be able to access it. Anyone with this token can perform the authorized actions against the resources the token has been granted access to.

This screen also includes an example command to test the token (reproduced below). The /user/tokens/verify endpoint allows fetching the current status of the given token.
curl -X GET "https://api.cloudflare.com/client/v4/user/tokens/verify" \ -H "Authorization: Bearer <token secret>" \ -H "Content-Type:application/json"
The result:
{  "result": {    "id": "100bf38cc8393103870917dd535e0628",    "status": "active"  },  "success": true,  "errors": [],  "messages": [    {      "code": 10000,      "message": "This API Token is valid and active",      "type": null    }  ]
}
With this you have successfully created an API Token and can now start working with the Cloudflare API!
Roll API token
If your token is lost or believed to be compromised, you can either create a new token or your token can be rolled to generate a new secret. Rolling your API token into a new one will invalidate the previous token, but the access and permissions will be the same as the previous API token.
To roll your API token:
- Log in to your Cloudflare account and go to User Profile > API Tokens.
- Next to the API token you wish to roll, click the three dot icon > Roll.
- Then, click Confirm to continue and you will see a new API token.