Filter DNS on devices
You can use Cloudflare Gateway and the Cloudflare WARP client application to filter and log DNS queries from devices on any network. Cloudflare Gateway will continue to secure devices in any location by filtering all DNS queries using the WARP client on the roaming devices.
🗺️ This tutorial covers how to:
- Create a DNS filtering policy that secures devices by blocking malicious hostnames
- Apply that policy to devices on any network
- Enroll devices into a Cloudflare Gateway deployment
⏲️ Time to complete:
30 minutes
Before you start
Create a DNS filtering policy
You can build a policy that will filter DNS queries for known malicious hostnames and other types of threats.
Navigate to the Policies page.
On the DNS tab, click Create a DNS policy.
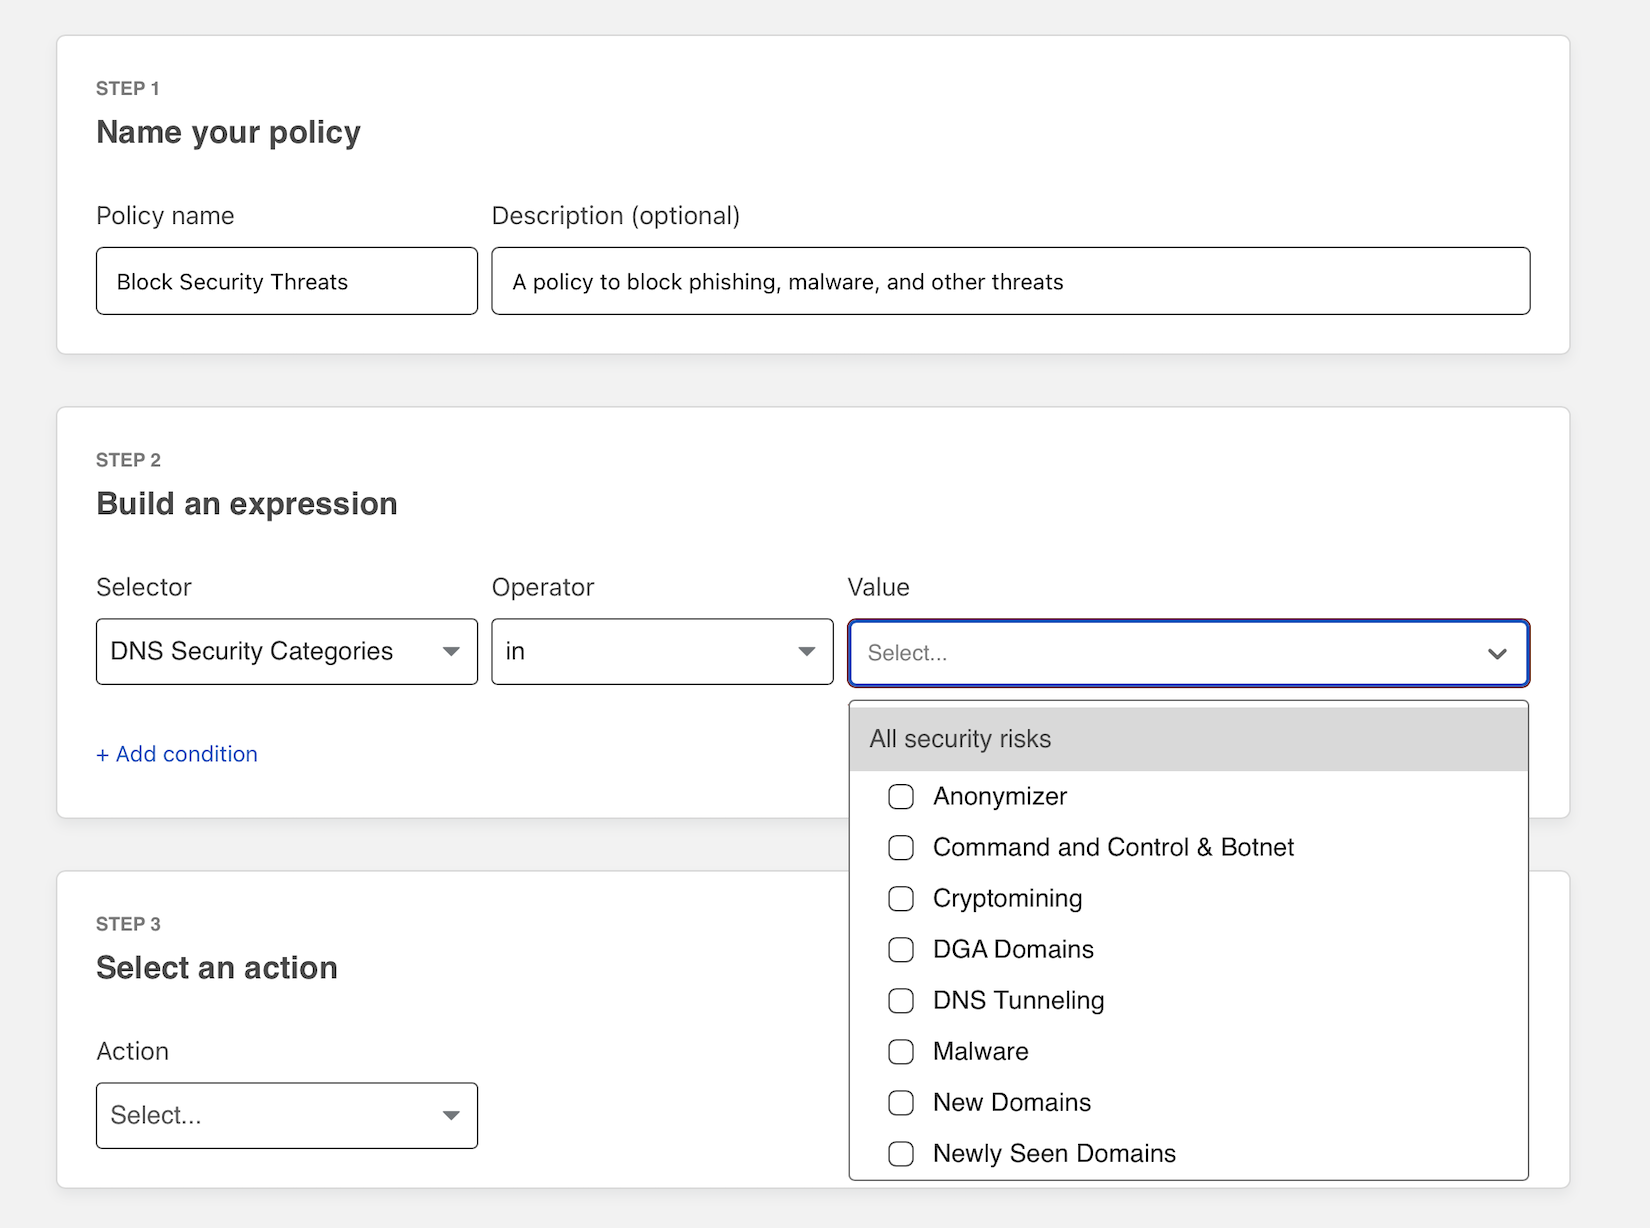
Assign the policy a name and add an optional description. Next, build an expression to determine what is blocked.
In this example, the policy will block any hostnames that Cloudflare’s data intelligence platform identifies as containing security risks like malware or phishing campaigns. You can click All security risks to include all options or check individual types of threats in the dropdown.

The policy will block security threats for any location or device in your Zero Trust deployment. You can specify that this should only apply to specific locations or to specific users and directory groups.
Choose
Blockas the action. You can optionally enable a block page that will be presented to users if they have the Cloudflare certificate on their devices. Click Save policy to conclude.The policy will now appear in your DNS policies list.
Integrate your identity provider
The DNS filtering policy created will apply to any DNS queries sent from configured locations or enrolled devices. You can begin to enroll devices by determining which users are allowed to enroll.
Navigate to the Settings section of the Zero Trust Dashboard and select Authentication. Cloudflare Zero Trust will automatically create a “One-time PIN” option which will rely on your user’s emails. You can begin using the one-time PIN option immediately or you can also integrate your corporate identity provider.
Determine which devices can enroll
Next, build a rule to decide which devices can enroll in your account.
Navigate to Settings > Devices > Device enrollment.
Click Manage.
Click Add a rule.
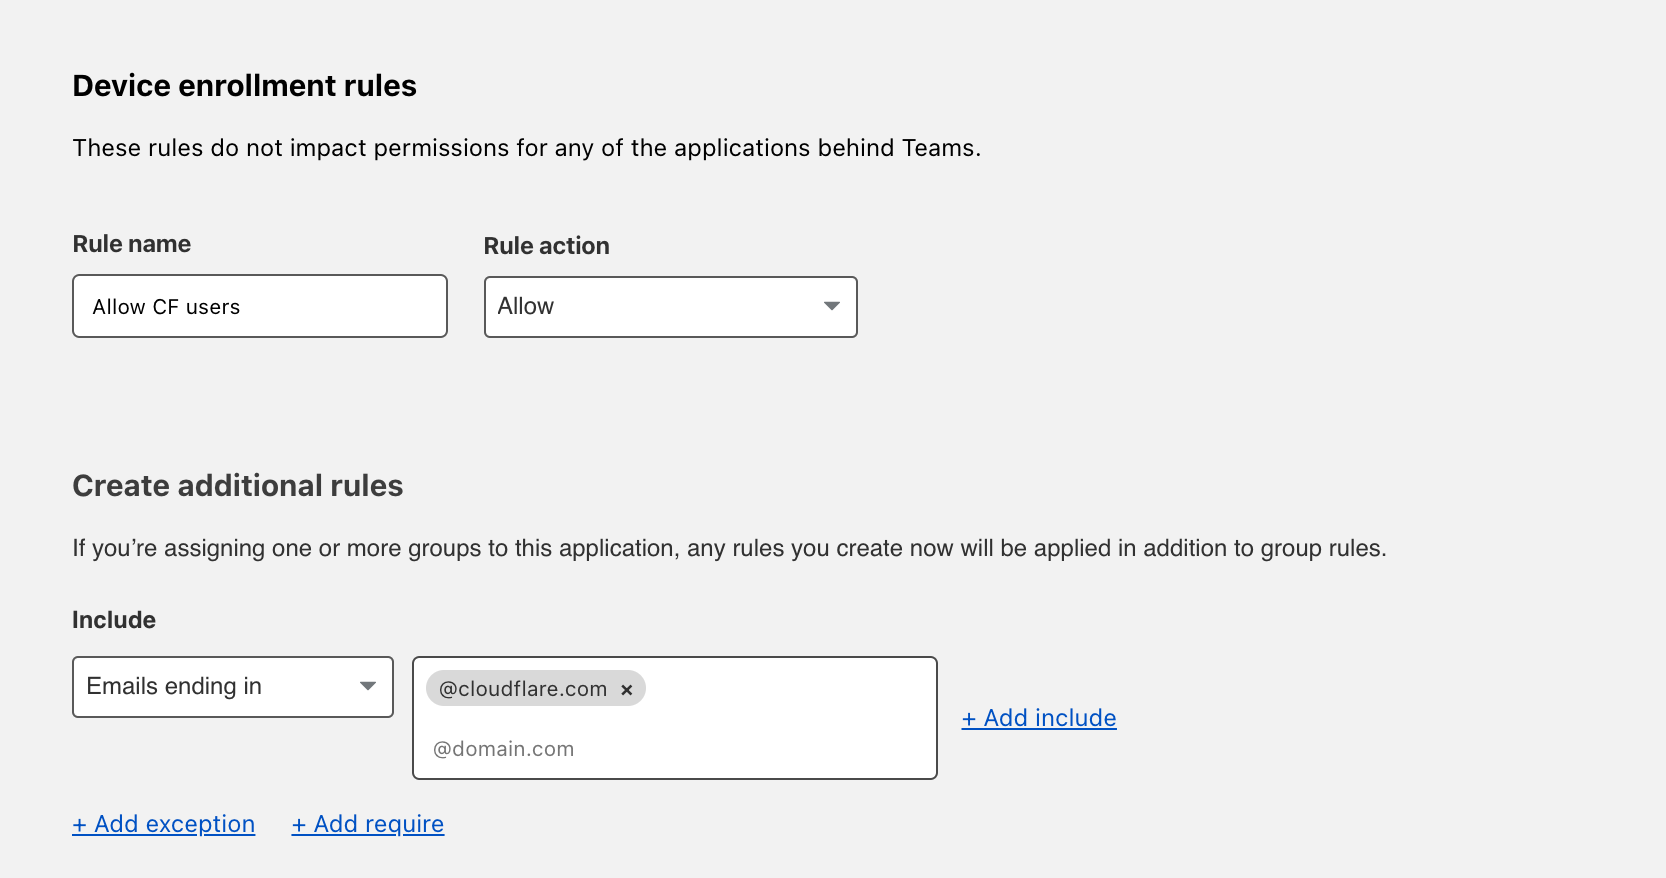
Determine who is allowed to enroll by using criteria including Access groups, groups from your identity provider, email domain, or named users. This example allows any user with a
@cloudflare.comaccount to enroll.
Click Save.
Collect your Team domain
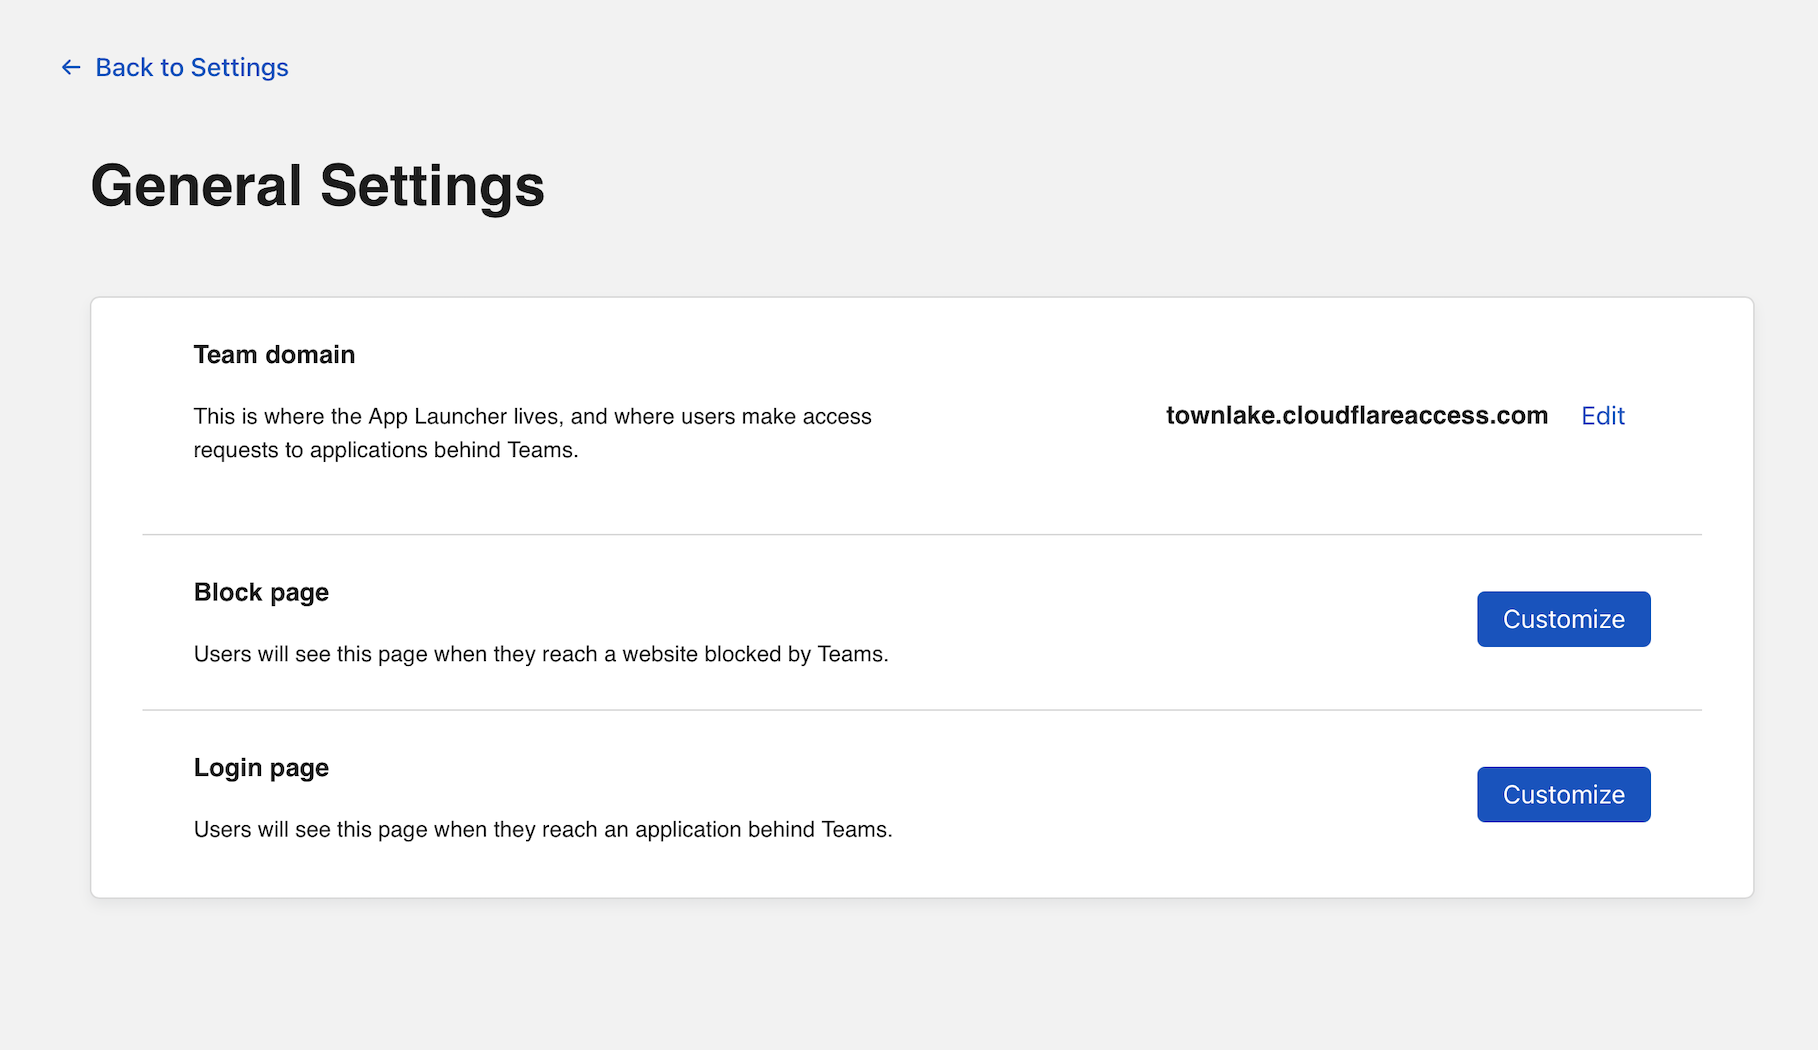
When you first created your Zero Trust account, the dashboard prompted you to choose a team domain. The domain will be in the format team.cloudflareaccess.com where team is replaced with the team name you selected.
You will need this name to enroll devices. You can confirm the team name selected by visiting the Settings section of the dashboard and selecting General.

Enroll a device
Your team members can run the WARP client to enroll in your Gateway account and send DNS queries to your configured policies. This section documents a self-serve user flow; you can alternatively deploy the agent with an MDM so that users do not need to take any action.
To begin the self-serve flow, follow the instructions here to install the client depending on your device type.
Once installed, click the logo in the toolbar and select the gear icon in the top right of the panel.
Under the
Accounttab, click Login to Cloudflare Zero Trust.Input the Cloudflare Zero Trust team name.
The user will be prompted to login with the identity provider configured or with the one-time PIN flow.
Once authenticated, the client will update to
Teamsmode.Click the gear to toggle between
Gateway with DoH, which only filters DNS, orGateway with WARP, which functions as a full forward proxy and can filter HTTP requests. In this use case, you only need DNS filtering.
Review logs and devices
As users enroll, you can review the users and associated devices by visiting the My Team section of the dashboard. You can also review logs in the Logs section by selecting Gateway. To add identity into the logs, your users will need to switch to Gateway with WARP mode.