Configure Zendesk SSO with Access for SaaS
This tutorial covers how to configure Zendesk SSO with Access for SaaS.
For this tutorial, you will need:
- A Zero Trust Account
- An integrated identity provider (IdP)
- Admin access to your Zendesk account
⏲️ Time to complete:
20 minutes
Configure Zendesk and Cloudflare
Navigate to your Zendesk administrator dashboard, typically available at
<yourdomain>.zendesk.com/admin/security/sso.In a separate tab or window, open the Zero Trust Dashboard, select your account, and go to Access > Applications.
Select Add an application, then choose SaaS.
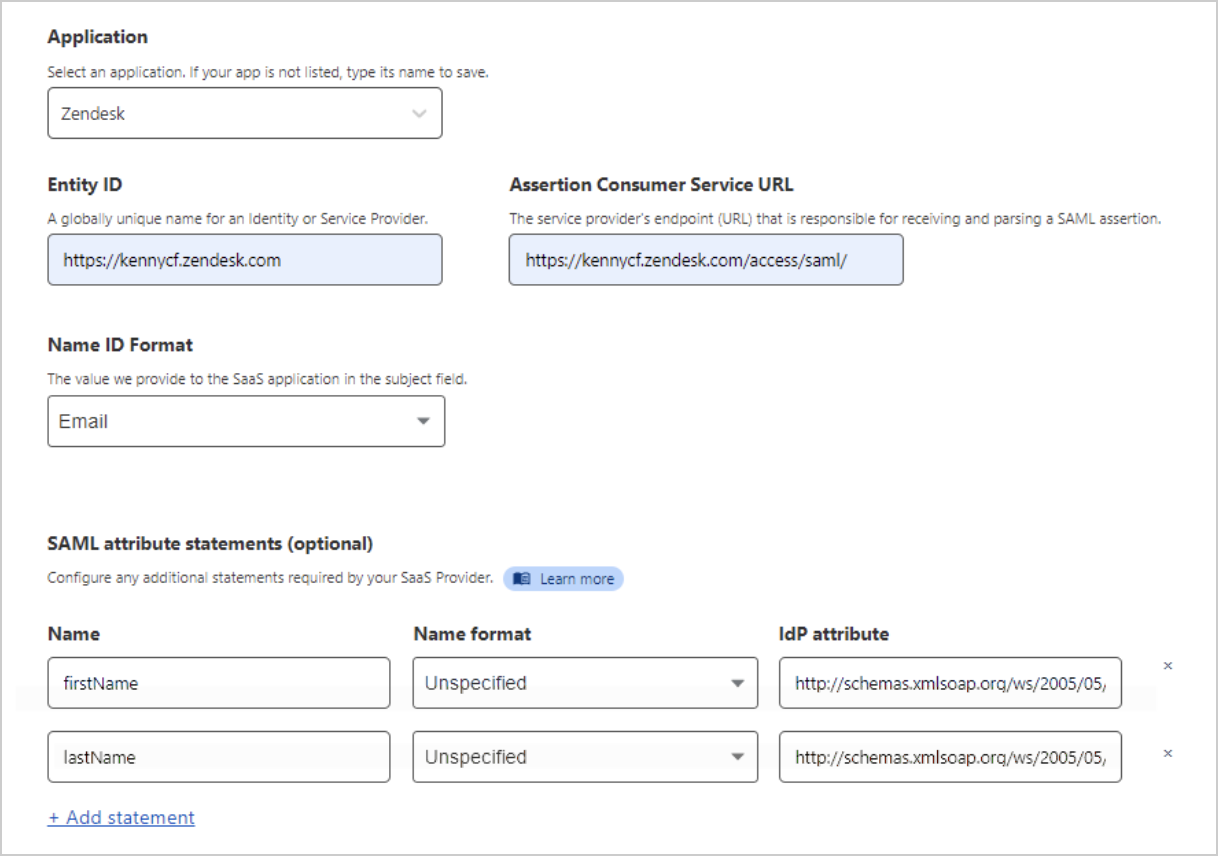
Input the following values in the Zero Trust application configuration:
Zero Trust field Value Entity ID https://<yoursubdomain>.zendesk.comAssertion Consumer Service URL contents of SAML SSO URL in Zendesk account Name ID Format Email (Optional) Configure these Attribute Statements to include a user’s first and last name:
Cloudflare attribute name IdP attribute value <first name>http://schemas.xmlsoap.org/ws/2005/05/identity/claims/givenname<last name>http://schemas.xmlsoap.org/ws/2005/05/identity/claims/surnameZendesk will use the user’s email address as their name if the name is not provided.

To determine who can access Zendesk, create an Access policy.
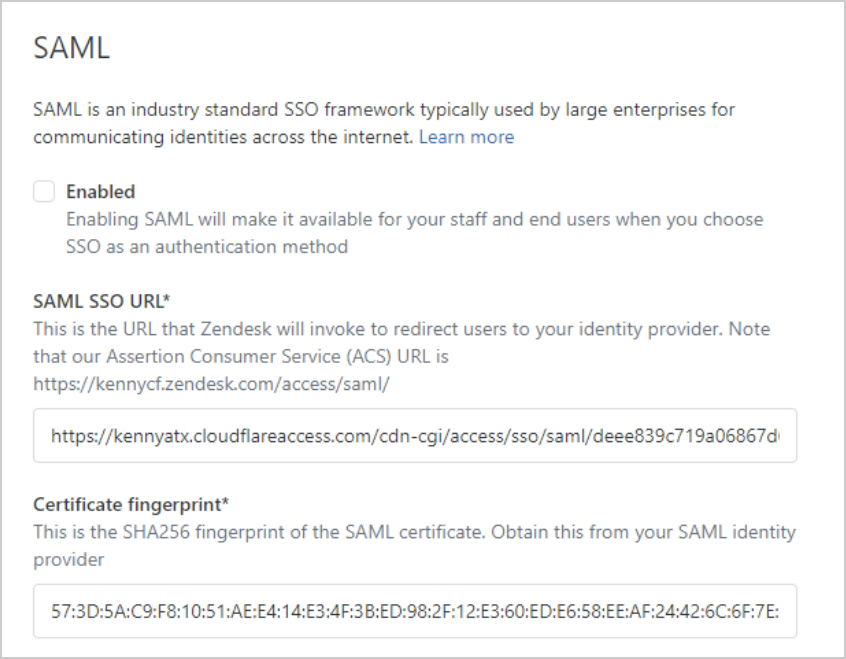
Copy the values from the Cloudflare IdP fields and add them to the following Zendesk fields:
Cloudflare IdP field Zendesk field SSO Endpoint SAML SSO URL Public Key (transformed to fingerprint) Certificate Fingerprint To transform the public key into a fingerprint, use a fingerprint calculator:
Copy the public key value and paste it into X.509 cert.
Wrap the value with
-----BEGIN CERTIFICATE-----and-----END CERTIFICATE-----.Set Algorithm to SHA256 and select Calculate Fingerprint.
Copy the Formatted FingerPrint value.

Go to
https://<yourdomain>.zendesk.com/admin/security/staff_membersand enable External Authentication > Single Sign On.
Users should now be able to log in to Zendesk if their Email address exists in the Zendesk user list.