Manage IP List items
View items in an IP List
Access the Lists interface available at Manage Account > Configurations > Lists.
Select Edit next to the list you want to view.
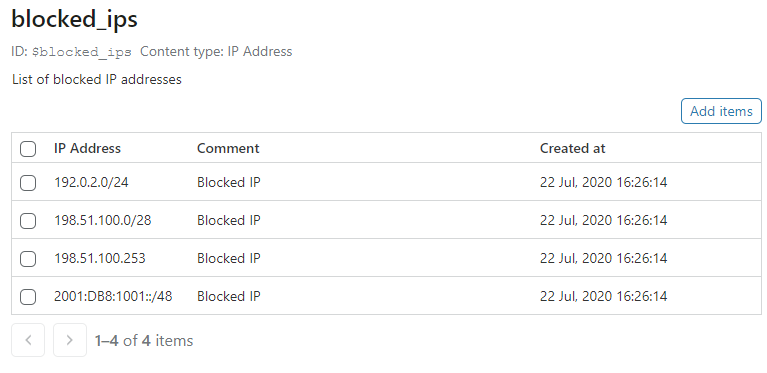
The list of items displays sorted by IP address, ascending:

Add items to a list
IP Lists support:
- Individual IPv4 addresses
- IPv4 CIDR ranges with a prefix from
/8to/32 - IPv6 CIDR ranges with a prefix from
/4to/64
You can combine individual addresses and CIDR ranges in the same list.
You can use uppercase or lowercase characters for IPv6 addresses in lists. However, when you save the list, uppercase characters are converted to lowercase.
To add items to an IP List:
Access the Lists interface available at Manage Account > Configurations > Lists.
Select Edit next to the list you want to edit.
Select Add items.
To add items to the list manually, use the text inputs in the Lists interface.
To add items in CSV format, select Upload CSV.
Add items to a list manually
In the Add items to list page, add an IP address and an optional description in the text inputs.
As you enter information into a text input, a new row of inputs displays below the current one. To delete any of the IP addresses that you have entered, select X.
Select Add to list.
Add items in CSV format
Use valid CSV file format
When uploading a CSV file containing a list of IP addresses and optional descriptions, be sure that each item is on its own line, as in this example:
<IP_ADDRESS_1>,<DESCRIPTION_1><IP_ADDRESS_2> Upload a CSV file
To add items to an IP List by uploading a CSV file:
In the Add items to list page, select Upload CSV.
Browse to the location of the CSV file, select the file, and then select Open. The displayed items in the page will include the items loaded from the CSV file.
You can continue to edit the items in the list before adding them:
- To delete any of the IP addresses that you have entered, select X.
- To add extra IP addresses manually, enter the information in the text inputs.
Select Add to list.
Delete items from a list
Access the Lists interface available at Manage Account > Configurations > Lists.
Select Edit next to the list from which you want to delete items.
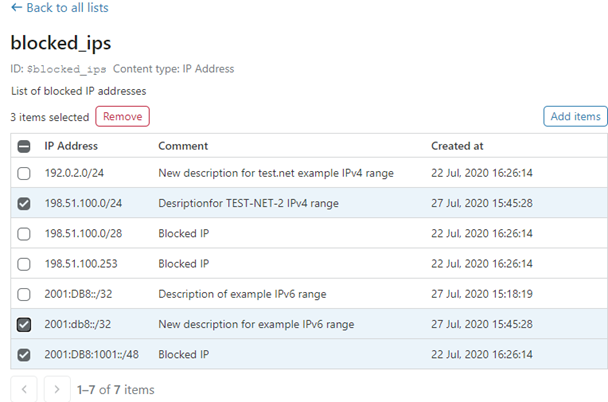
Select the checkboxes next to the items you want to delete. To select all the items, use the checkbox in the column header:

Select Remove.
In the confirmation dialog, select Remove to complete the operation.